AMSA
Setting up Virtualbox’s OVA and Git brief
Introduction
This page covers how to set up Virtualbox with the subject’s virtual machine and a brief on Git’s basics
Setting up the subject’s OVA in VirtualBox
General (both architectures)
Install Virtualbox
If you already have Virtualbox installed, and your version is lower than 7.2.0 (which is pretty probable):
- Completely uninstall Virtualbox
- Reinstall Virtualbox completely, from the newest version
If you’re curious about the issue and why it was breaking down, you can check the issue and/or the commit that broke it all.
Non-silicon/x86 (Linux/Windows users)
Download the image from this link, download the file and double-click it to import the box. User amsa and password amsa
Silicon/ARM (MAC M1 or newer users)
Download the image from this link, download the file and double-click it to import the box. User amsa and password amsa
Git summary
As previously stated, we’ll be using Git and Github to complete assignments.
Each time you fork one of our template repositories for an assignment, a new GitHub repository will be created for you within the AMSA 26–27 organization.
Create a github account
You can skip this step if you already have a github account
Go to github.com and create an account. There’s no need to use your university email address (you’ll likely use your GitHub account for personal projects and other work beyond this course).
Creating an SSH key to authenticate to Github
You can skip this step if you already have an SSH key configured on your machine to be used on Github
The first step will be to create an SSH key on your machine to authenticate to Github and be able to interact with it. For this, you can follow Github’s guide on how to do it.
ssh-keygen -t ed25519 -C "your_email@example.com"
// Press enter until finished, input a password only if wanted

cat .ssh/id_ed25519.pub
// Copy all the file

// Go onto github.com -> settings -> SSH & GPG keys
// Add a new authentication key, with any title and the contents of the file you copied
Acessing the organization
Scan the following QR code and type your username to be sent an invite to the Github organization  Or use this link
Forking the project
To create your own repository for the assignment, you first need to fork the template repository provided by the teachers. Follow these steps:
- Go to the GitHub page of the organization.
- Find the assignment repository you want to work on.
- Fork the repository into the organization. Make sure the fork is private and give it a clear, descriptive name that includes your name.
- Once the fork has been created, you can clone your repository locally and start working on the assignment.
1) Go to the github page of the organization.
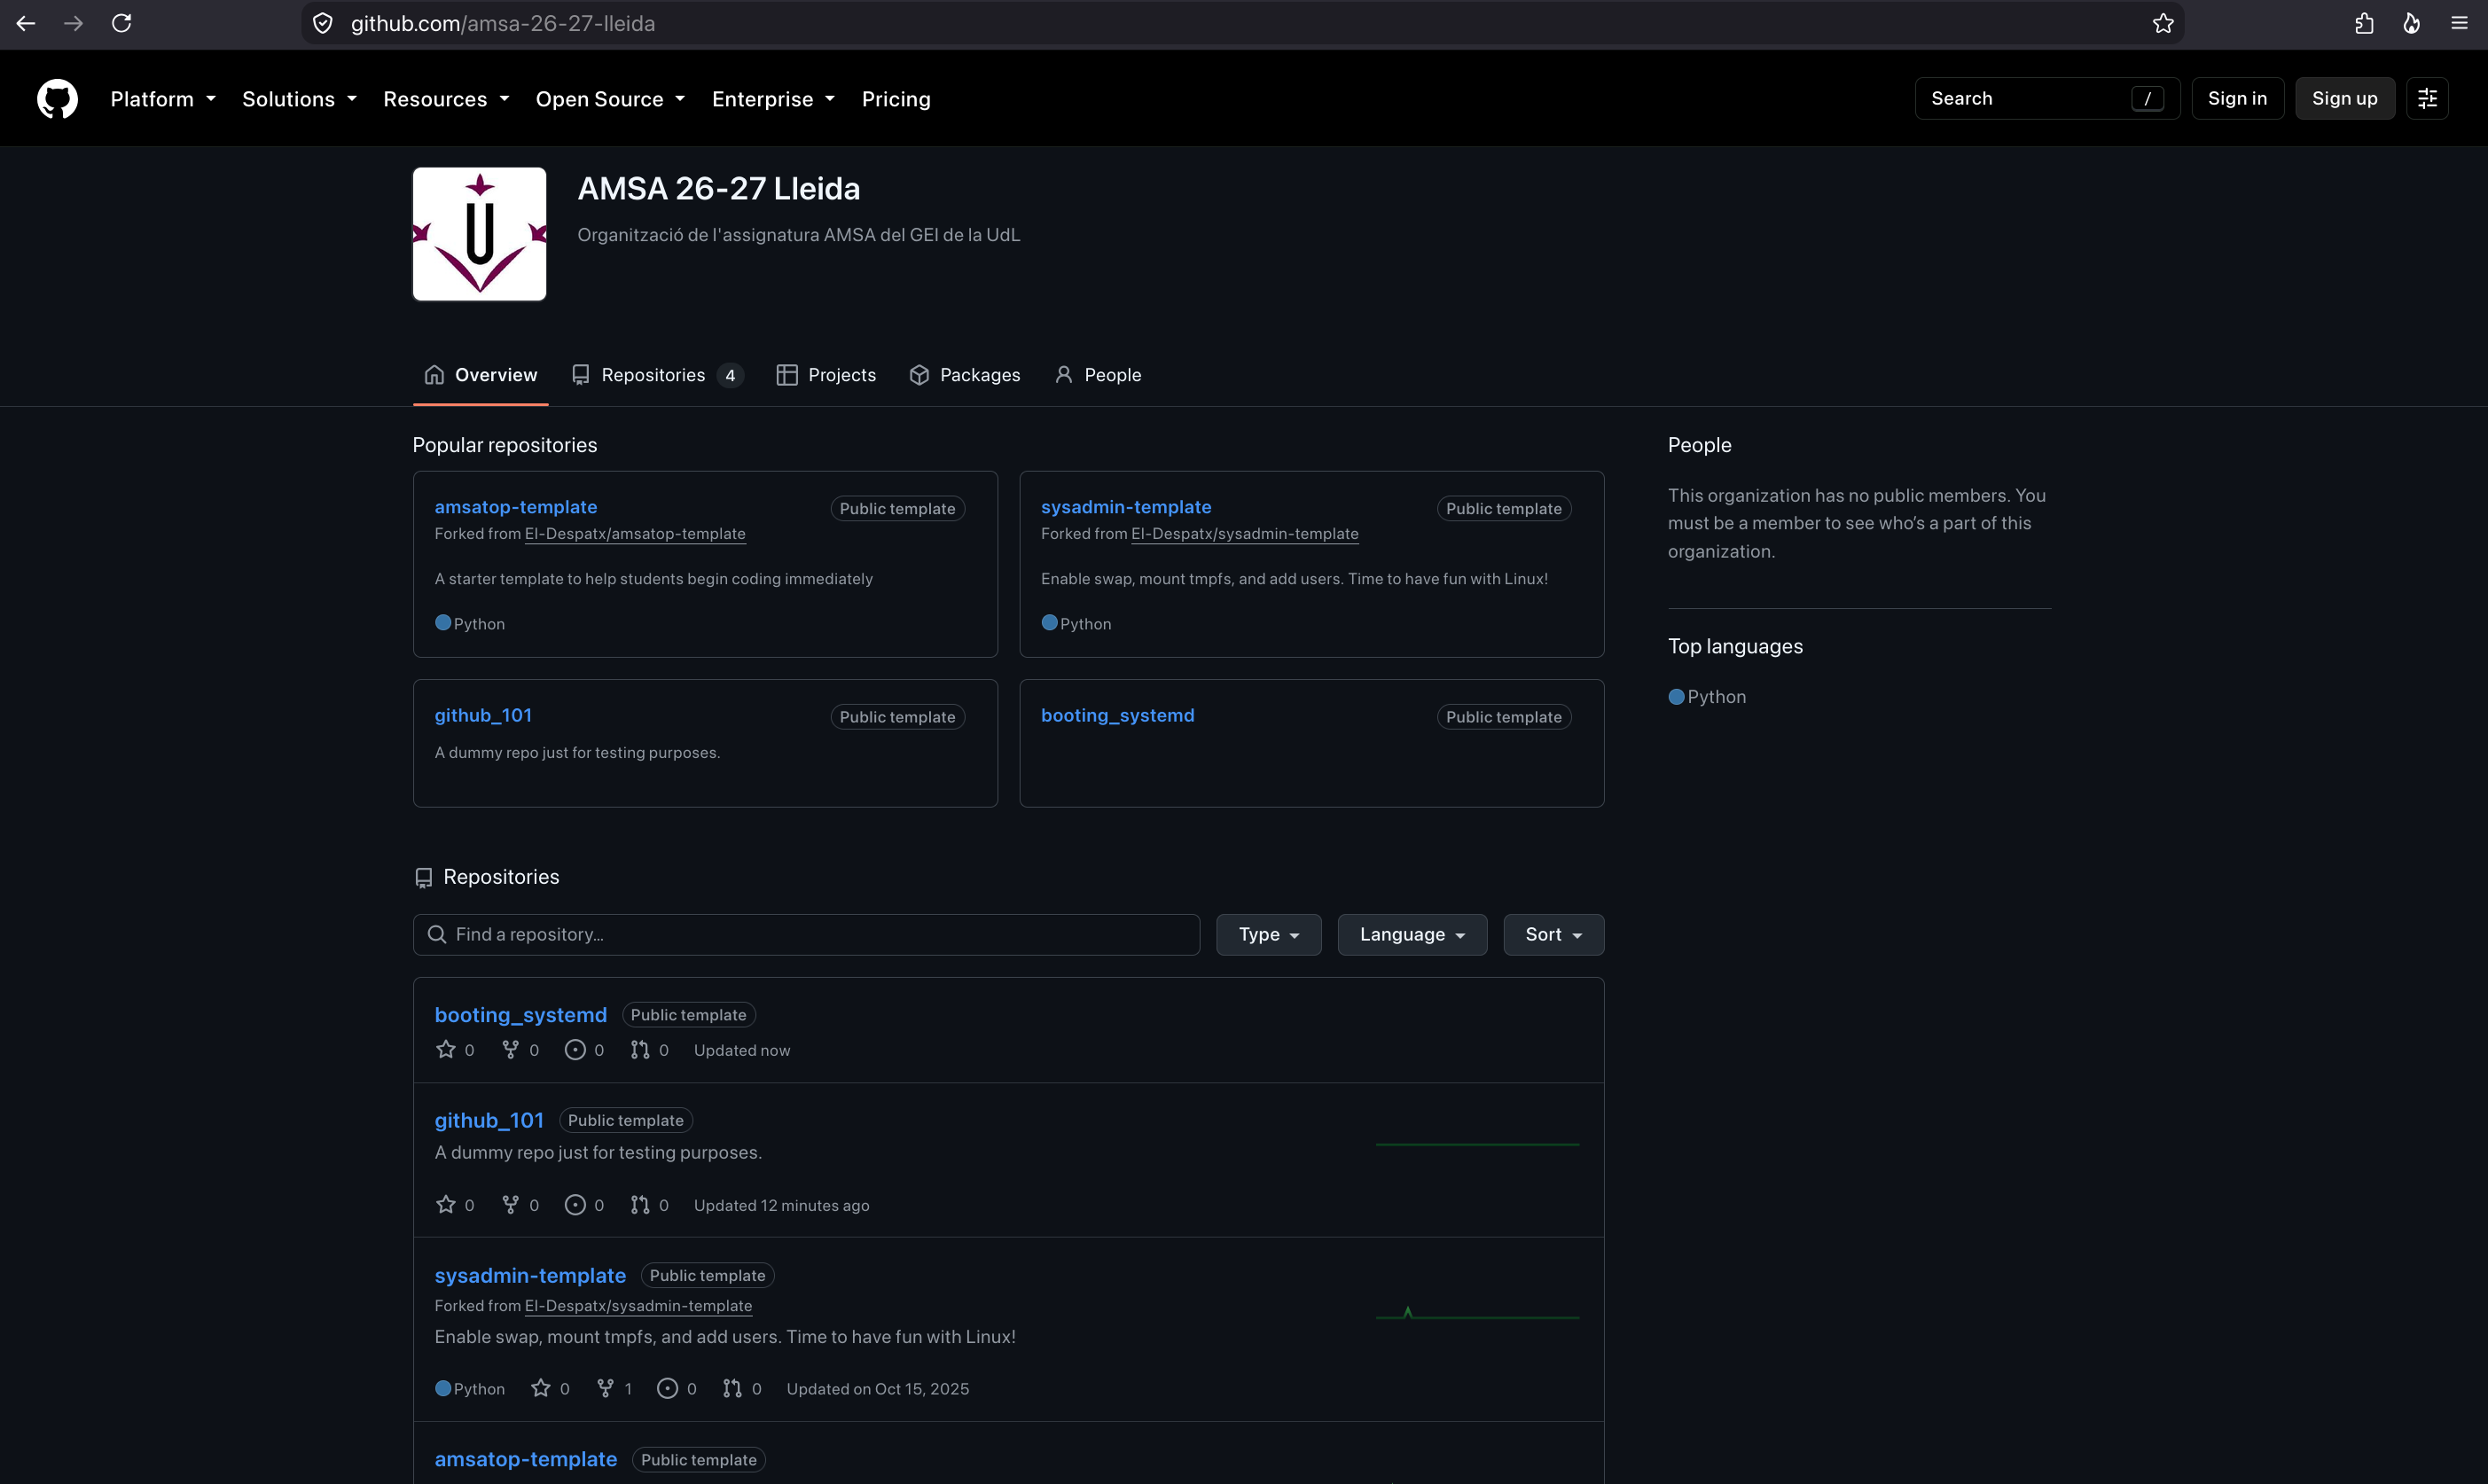
Go to the github page of the organization. You should see something like this:
2) Go to the repositories section of the organization
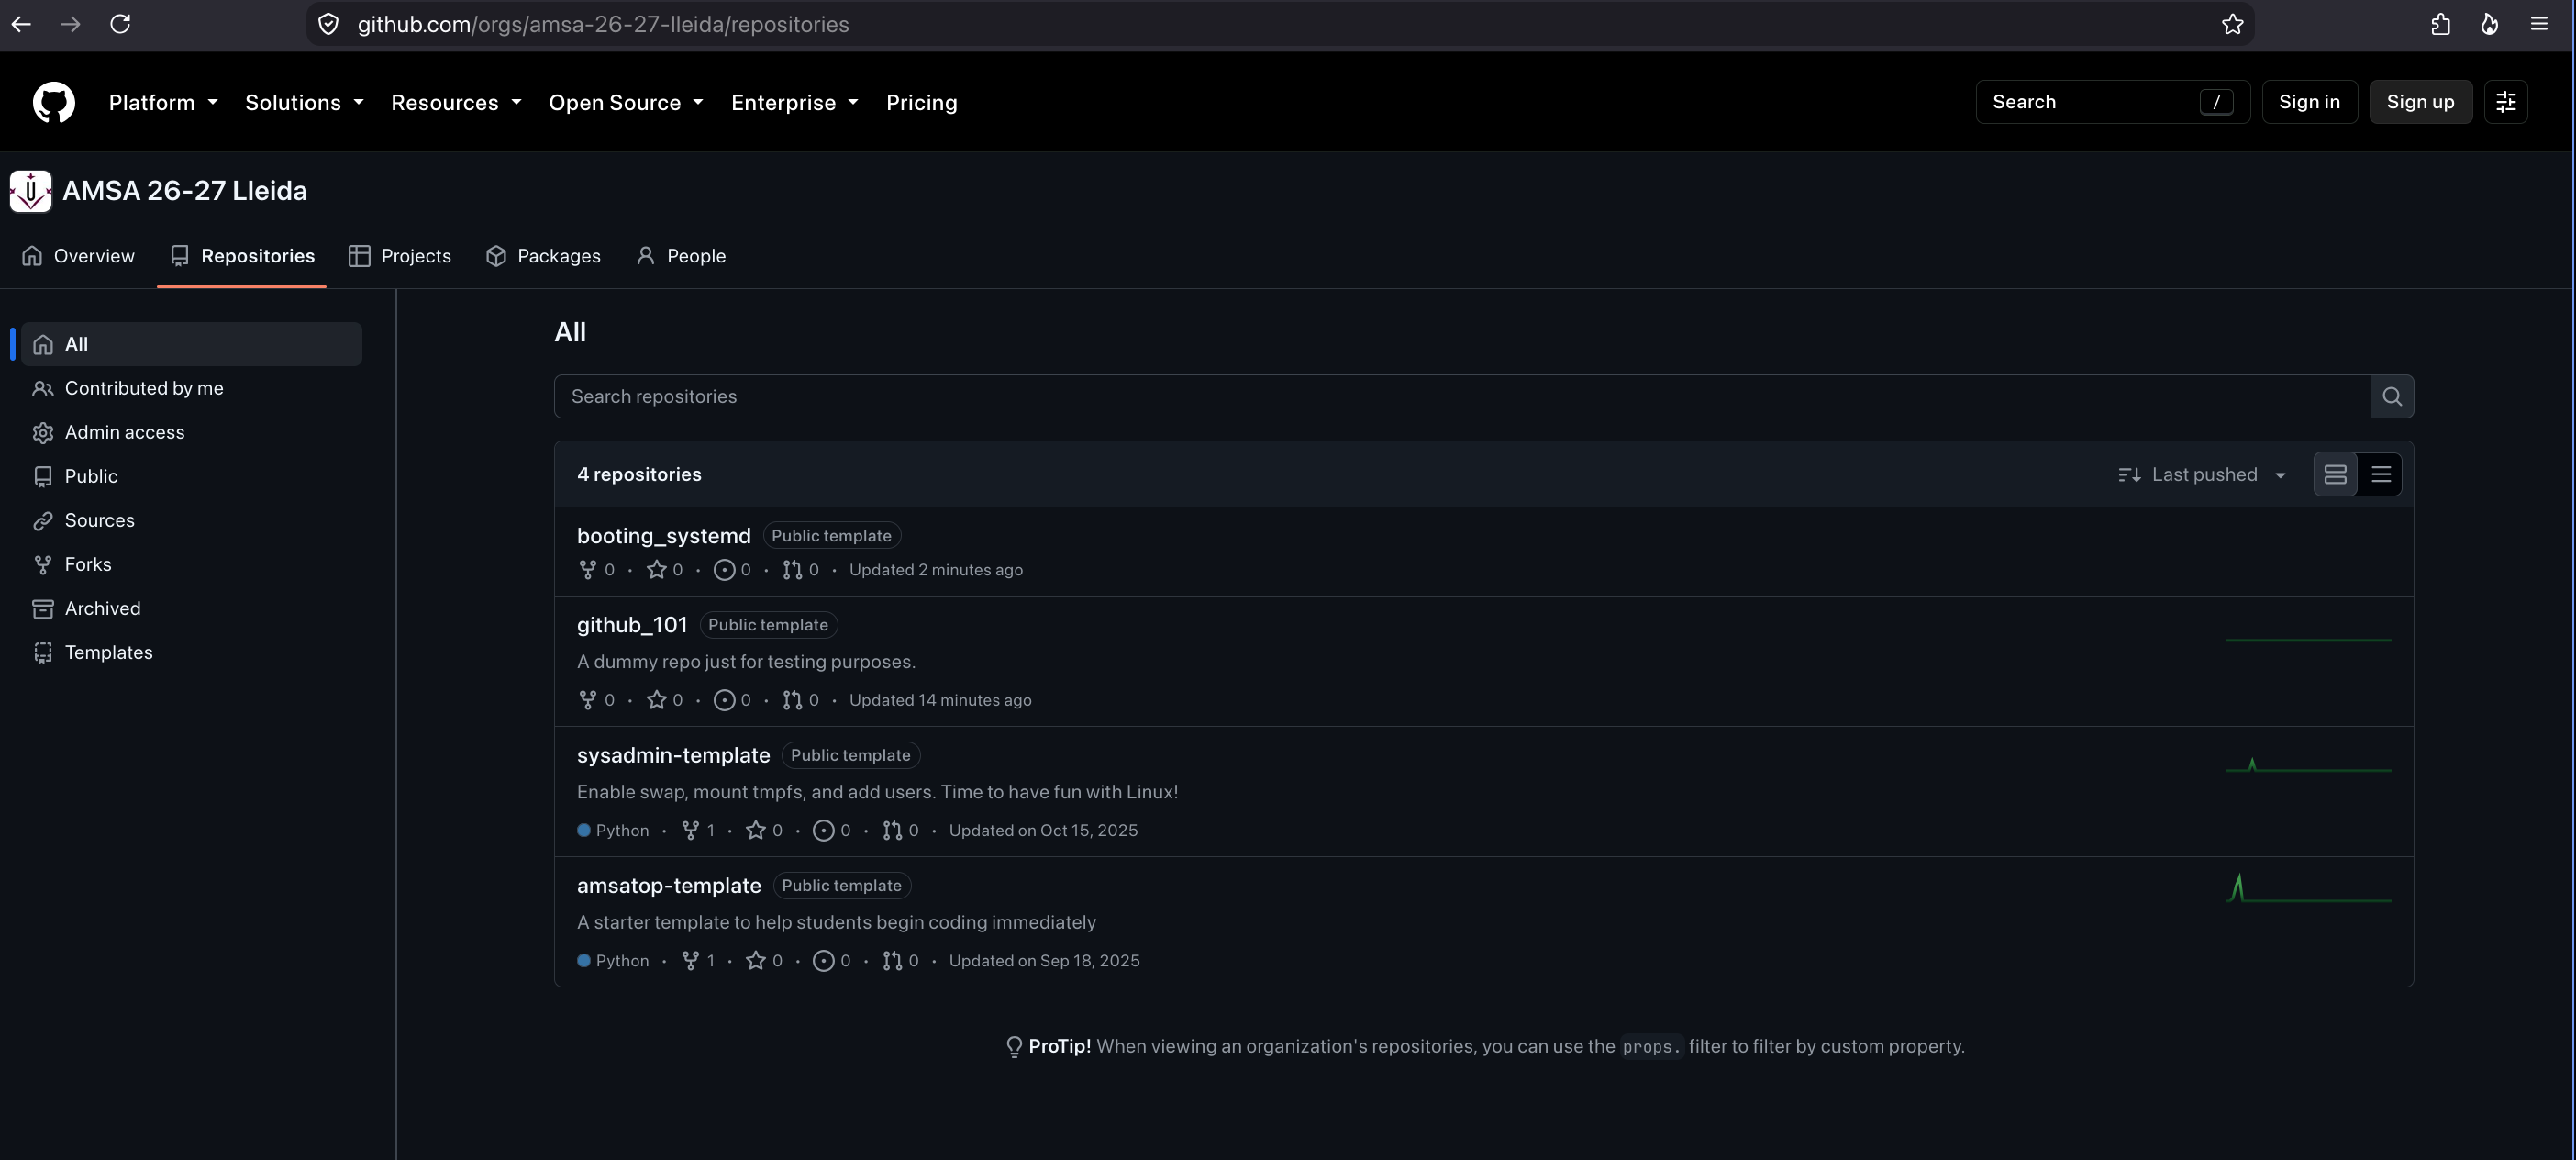
3) Click to the repository you want to fork
For this example, we’ll use the “demo” assignment, called github_101.
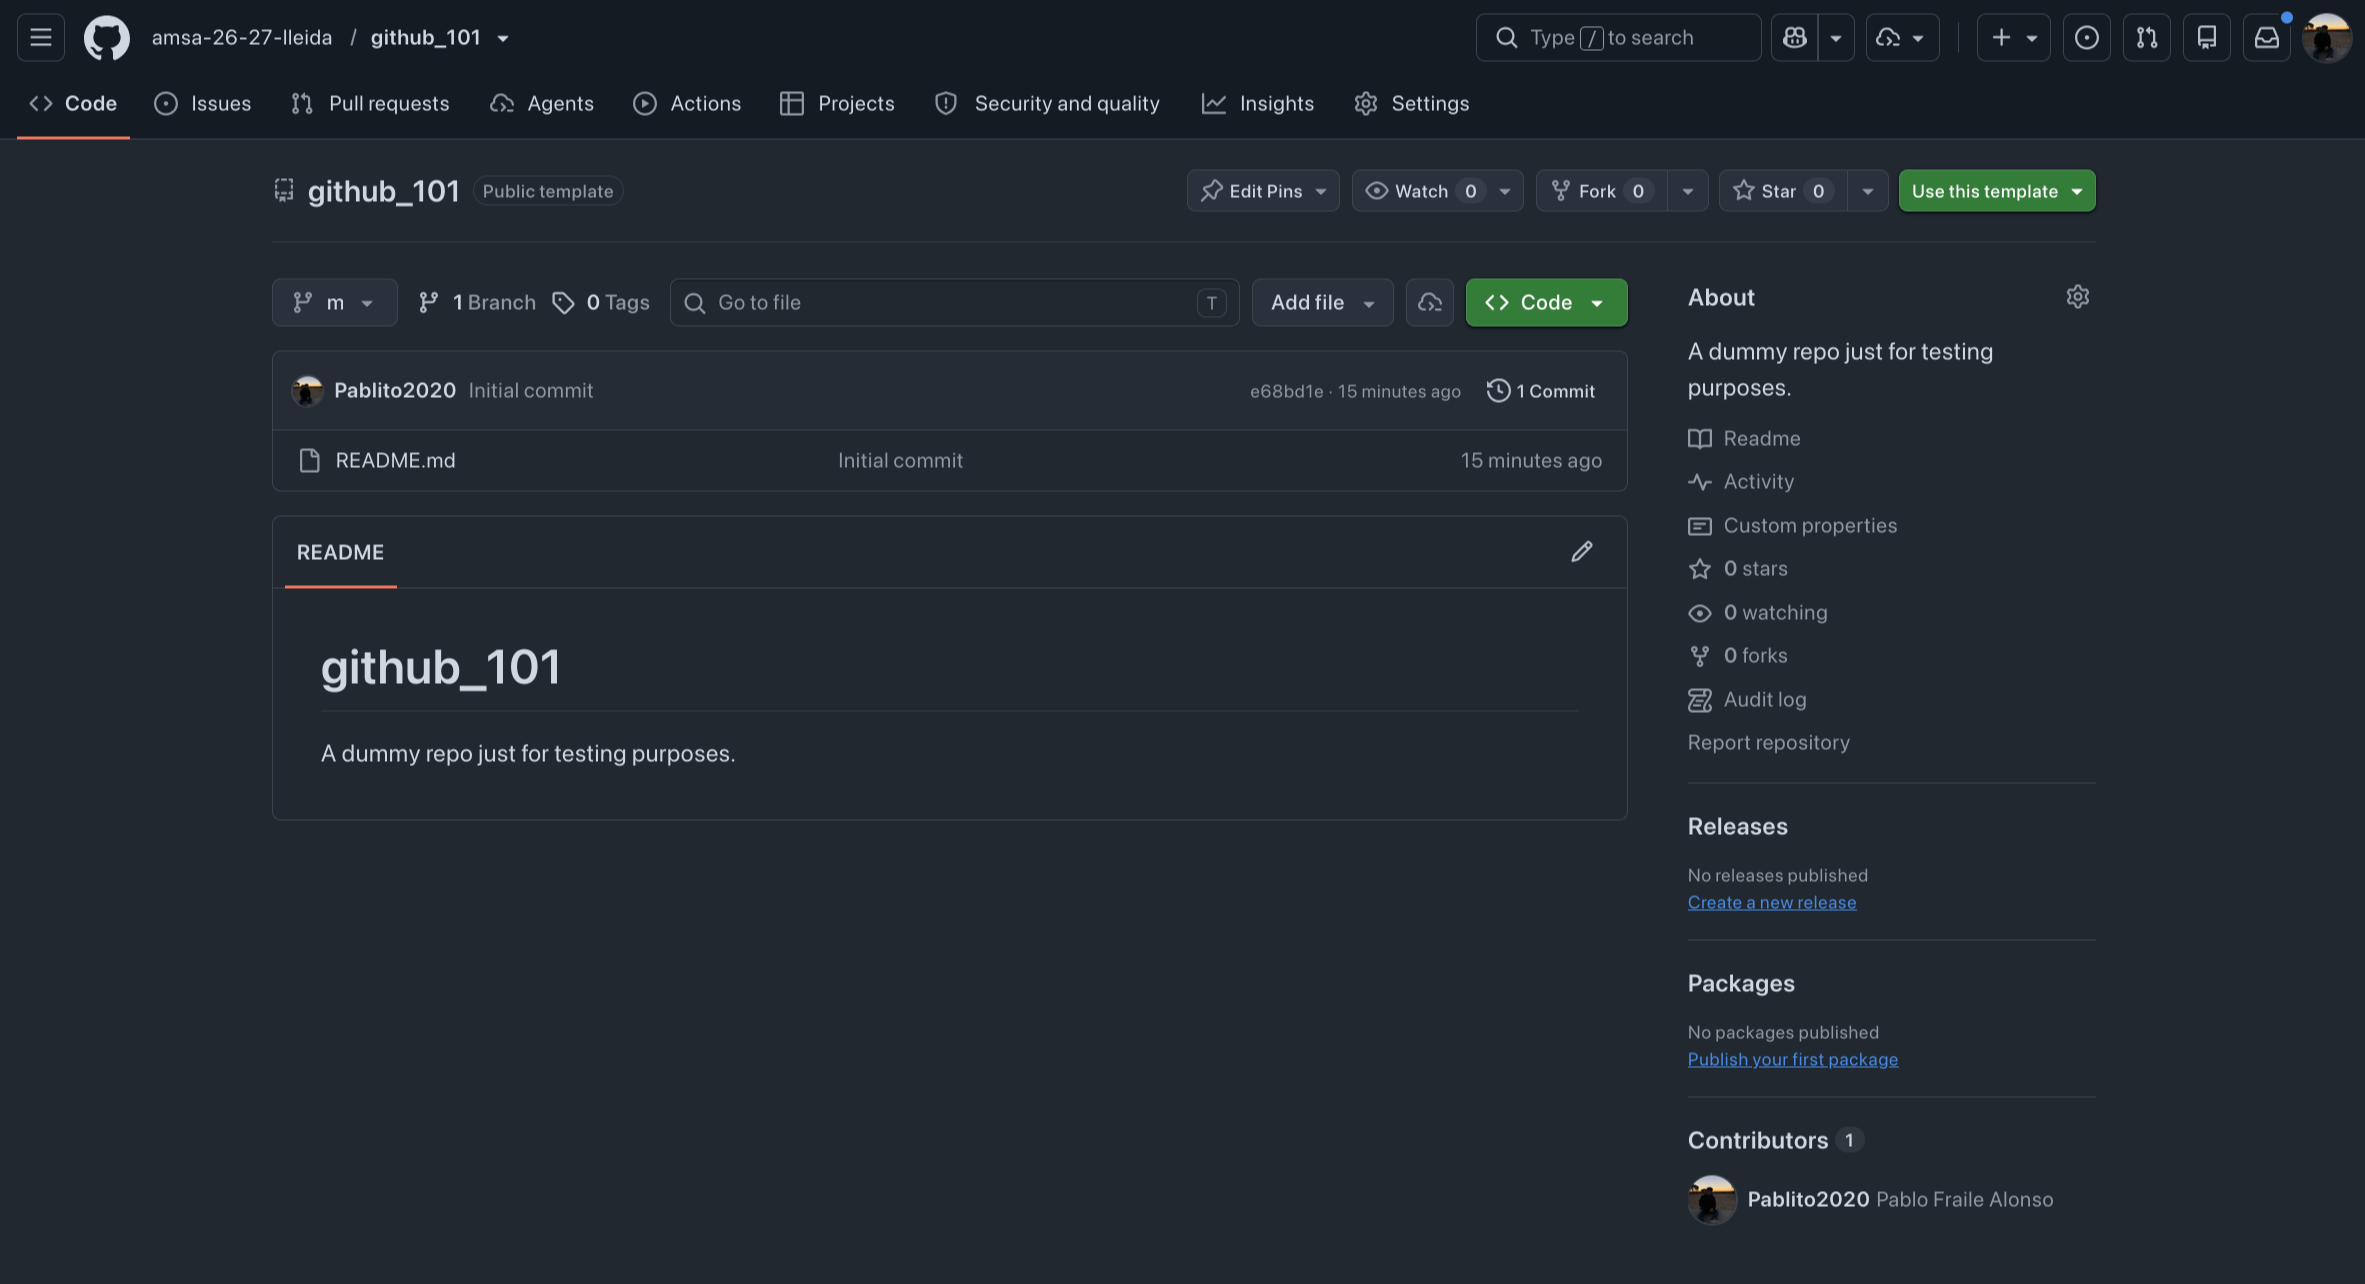
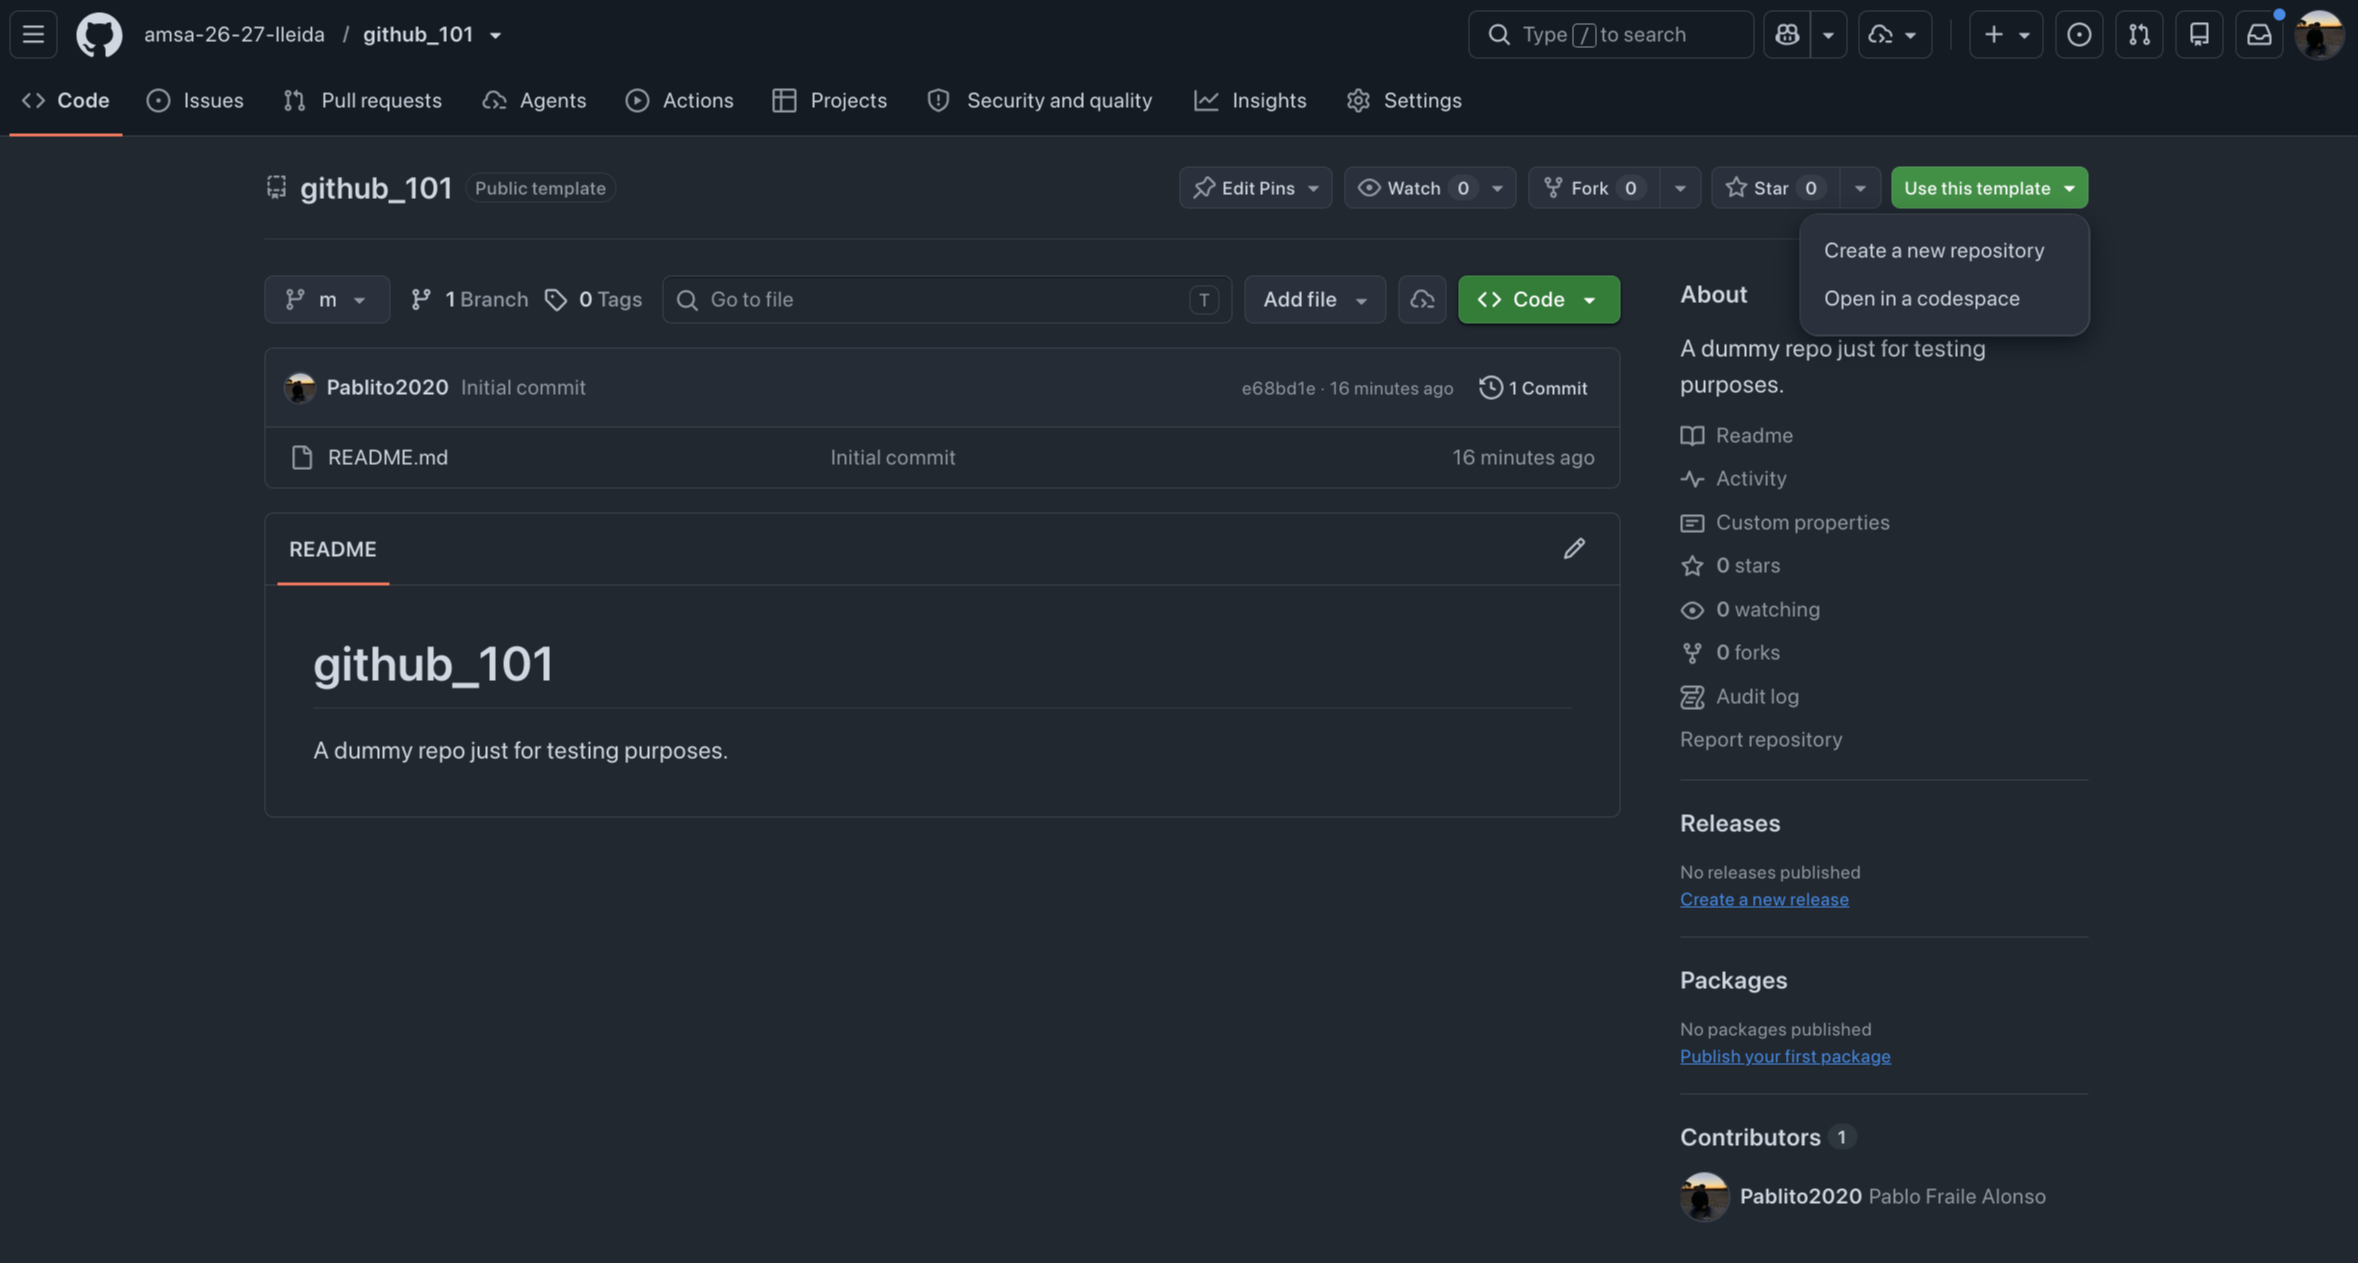
4) Click on “use this template”, and “Create a new repository”
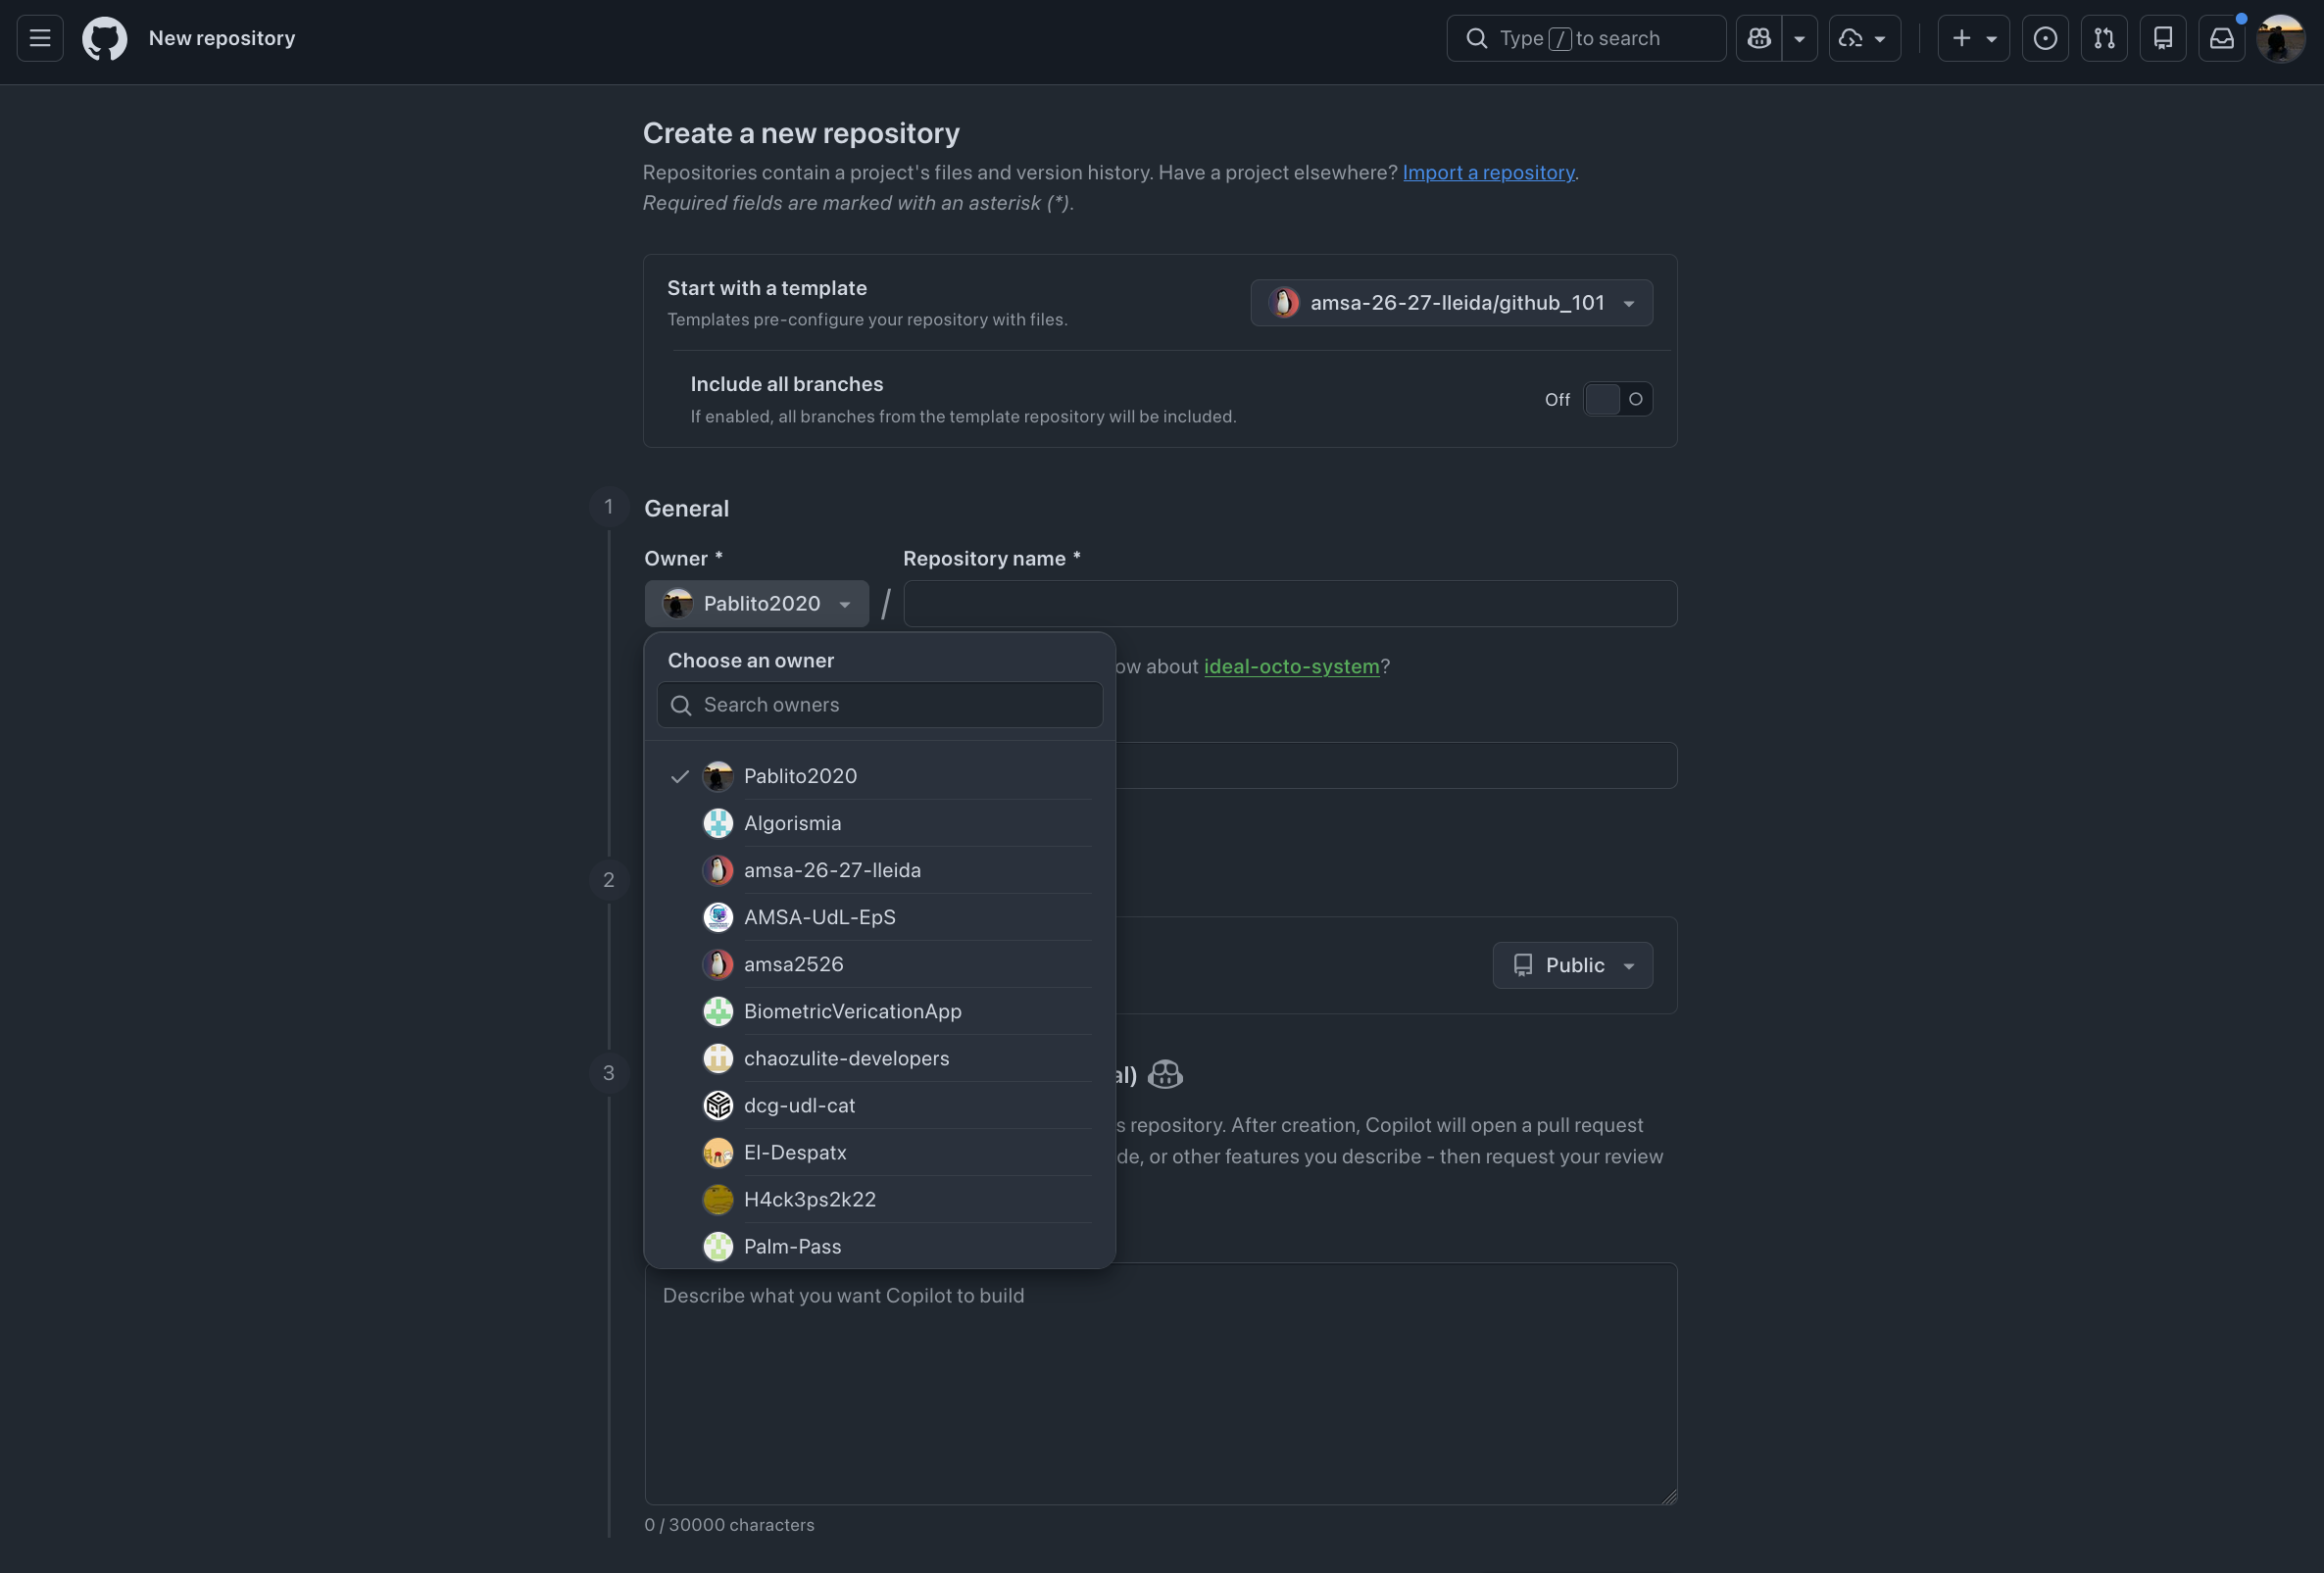
5) Change the repository to be within the amsa-26-27-lleida organization:
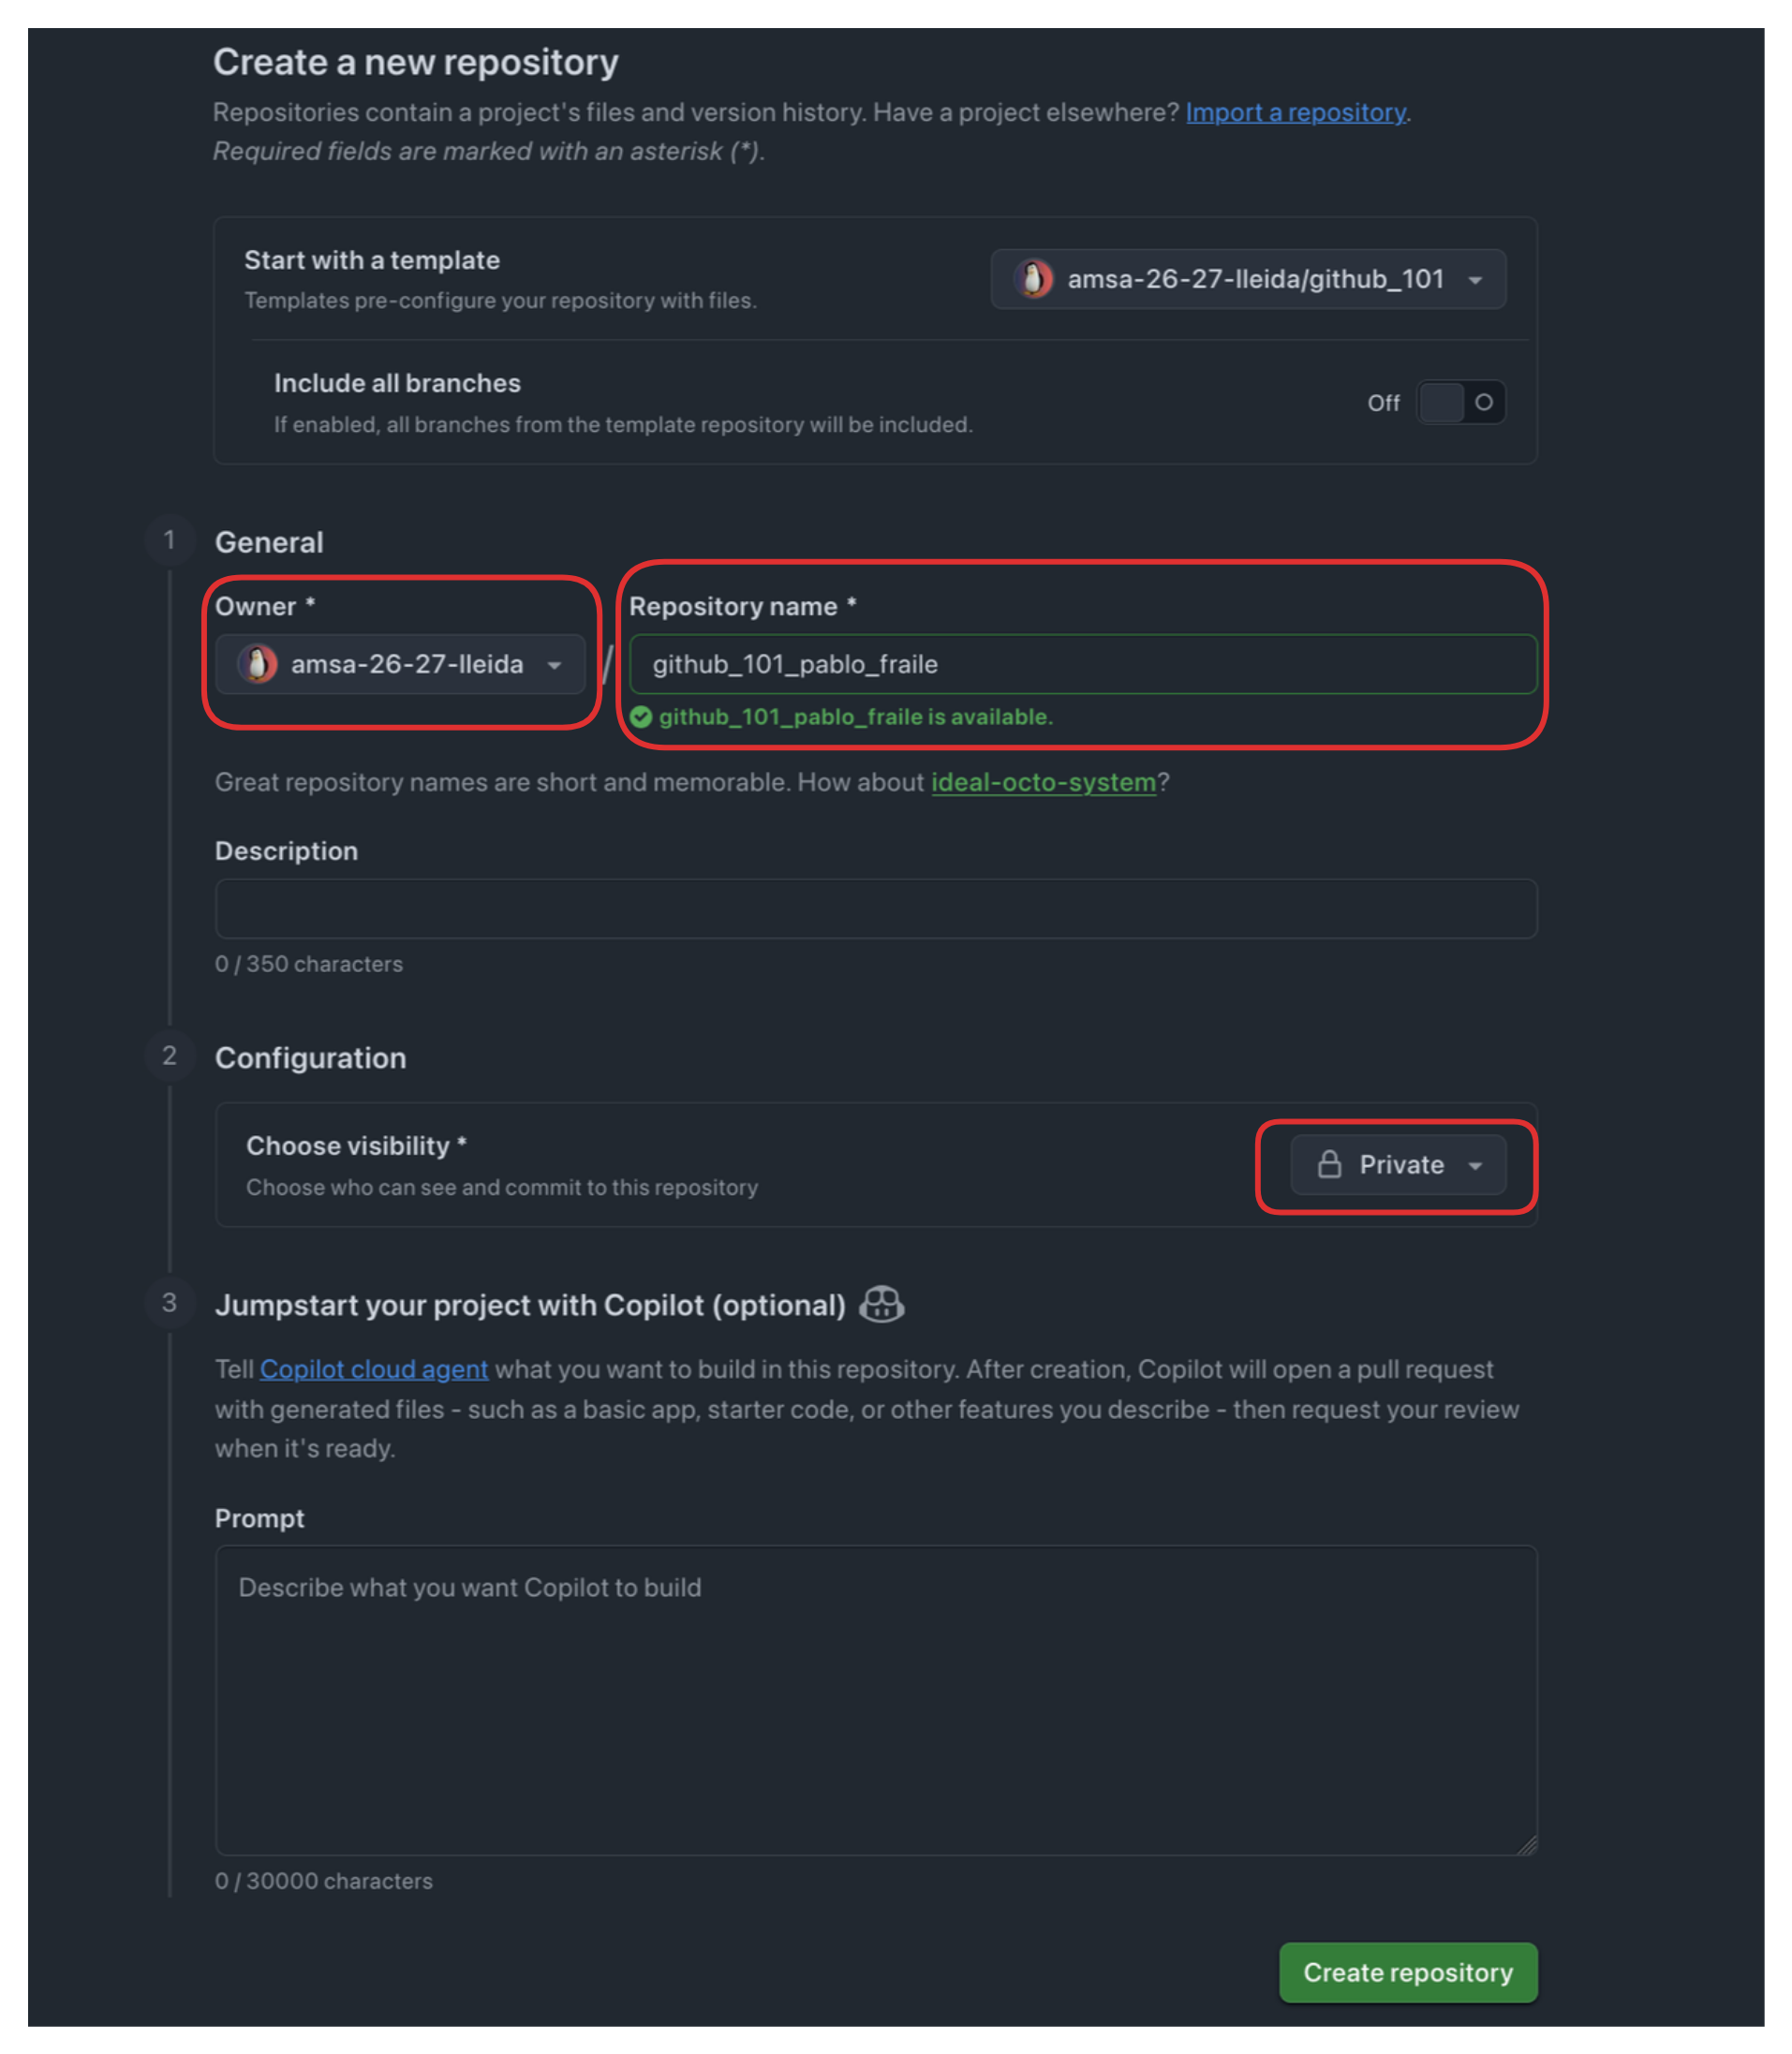
6) Add a name, and put it private.
You must name it as: {name_of_the_assignment}_{your_name}_{your_surname}.
7) Finally, you’ve your repo!
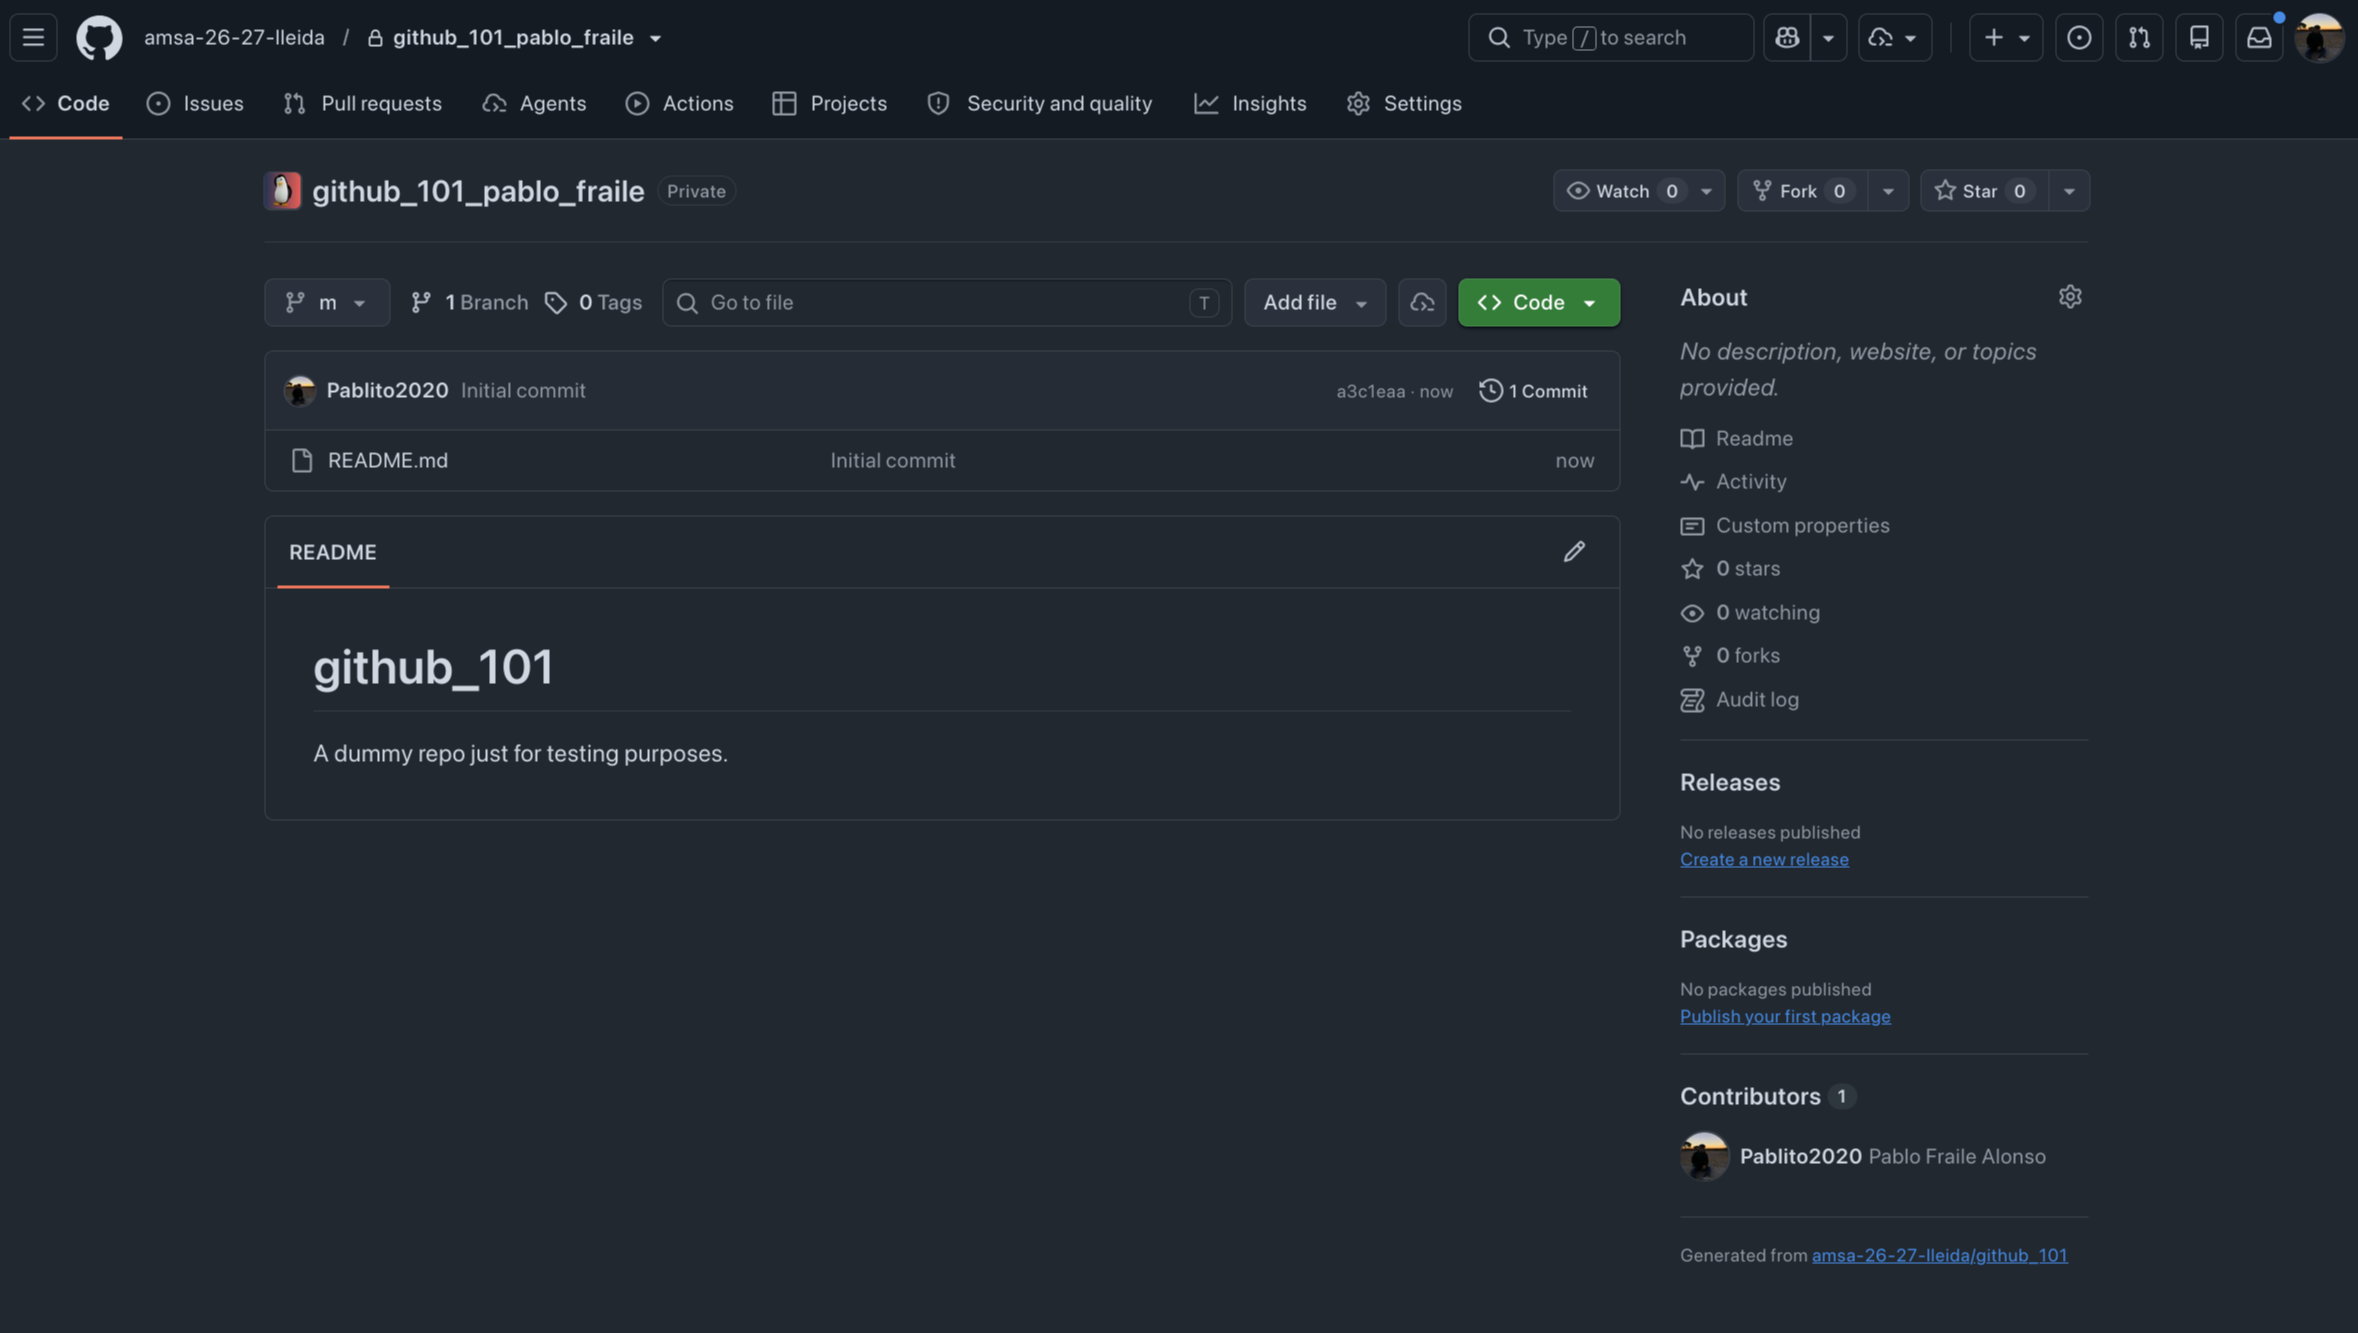
Cloning the project
The next step will be to clone this repository so that we can work on it locally. This guide will cover how to set it up via terminal, but you’re free to use other tools like Github Desktop or Git’s extension on VSCode
Install git on your system, through your prefered package manager or through the webpage if you use Windows🤢🤮
Now, head onto Github, open your repository and copy the SSH direction of it:
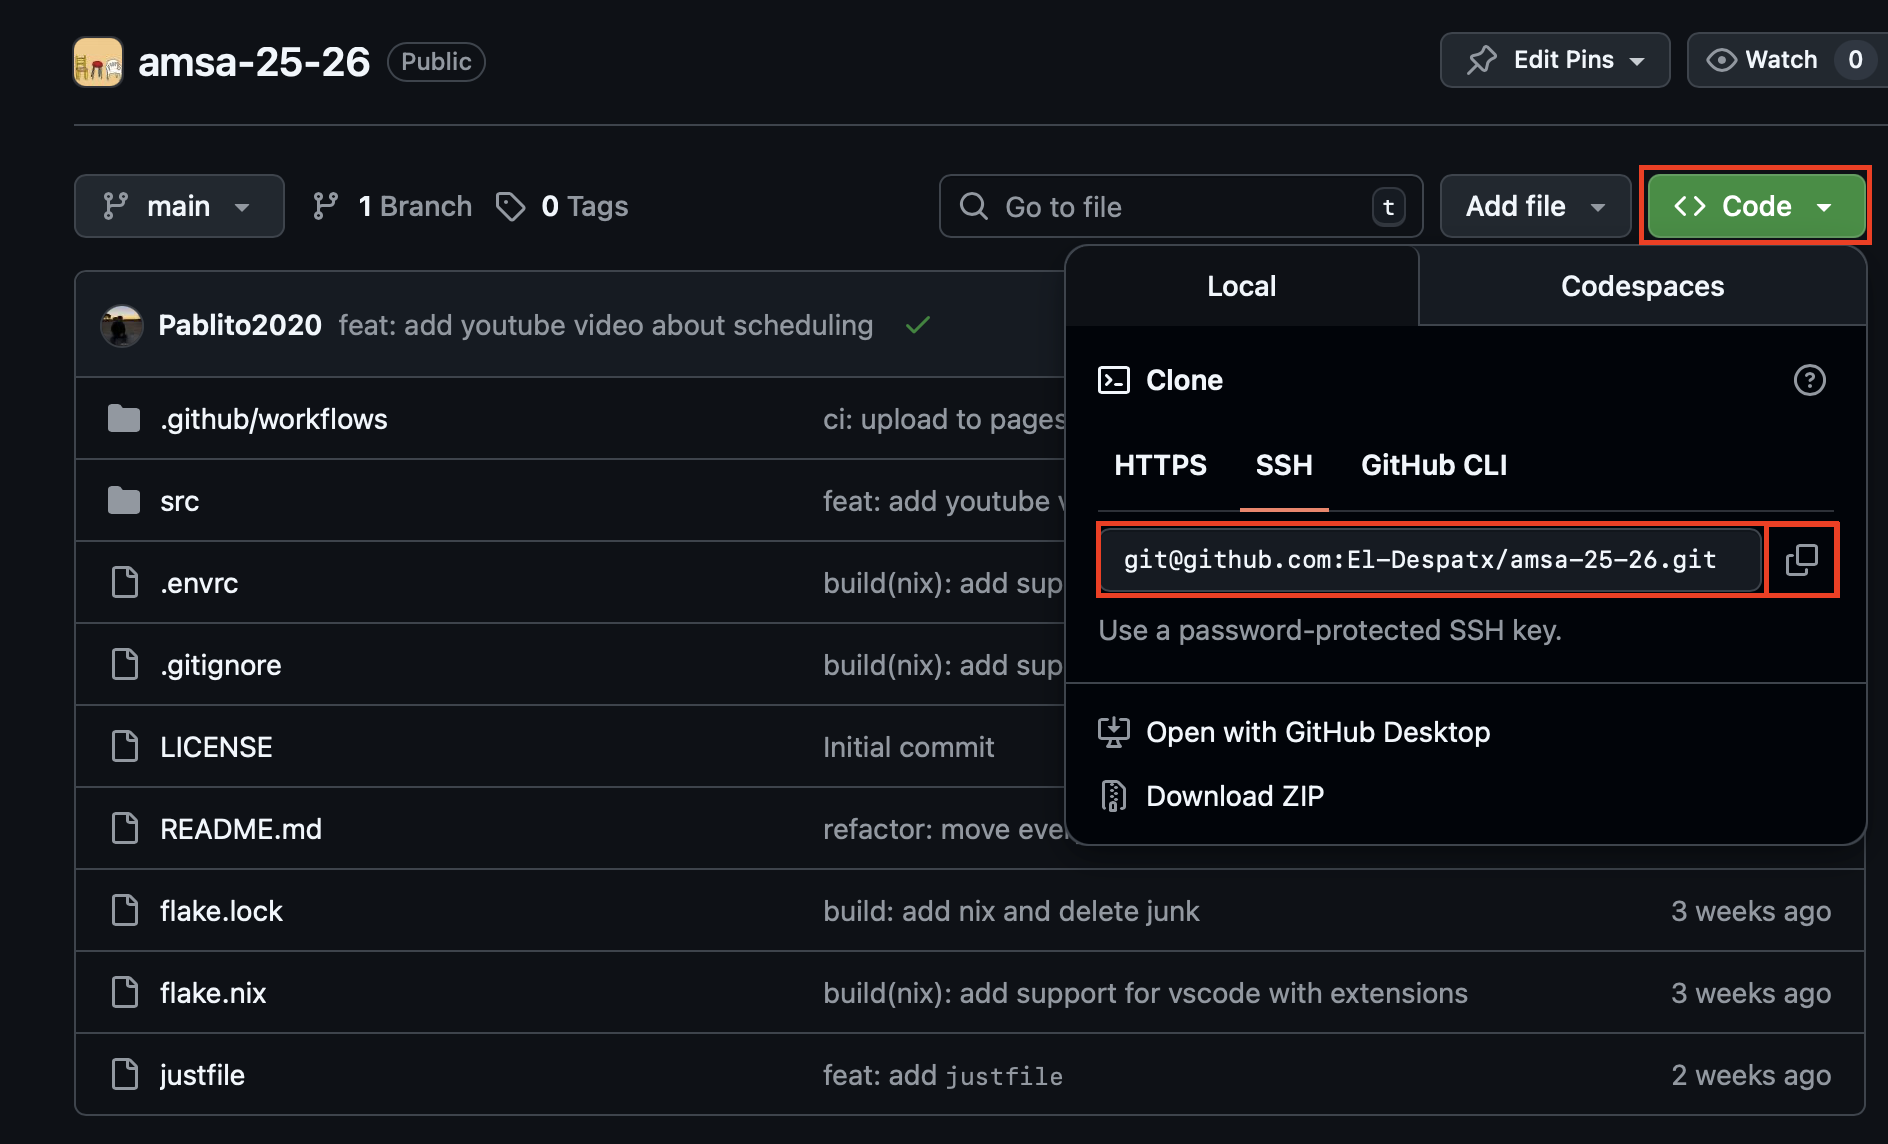
Next move onto the directory where you wish to clone your repository and type:
git clone <SSH direction>Now you have your project on a folder on your computer and you can work on it as if it was any normal folder.
Uploading new versions of the project
Now that we’ve added changes to our folder, it’s time to commit and upload them. Here we cover some of the main commands
git statusTells you the current state of the repository. On a folder with uncommited changes it will say something like:
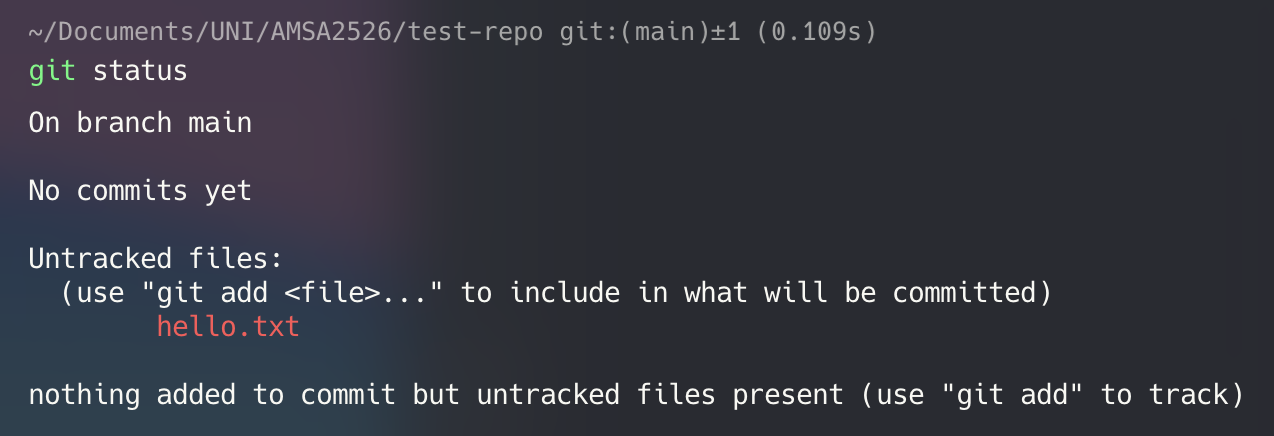
Just as the terminal says, we have to add the new files to be tracked by git. We can do so by using:
git add <files>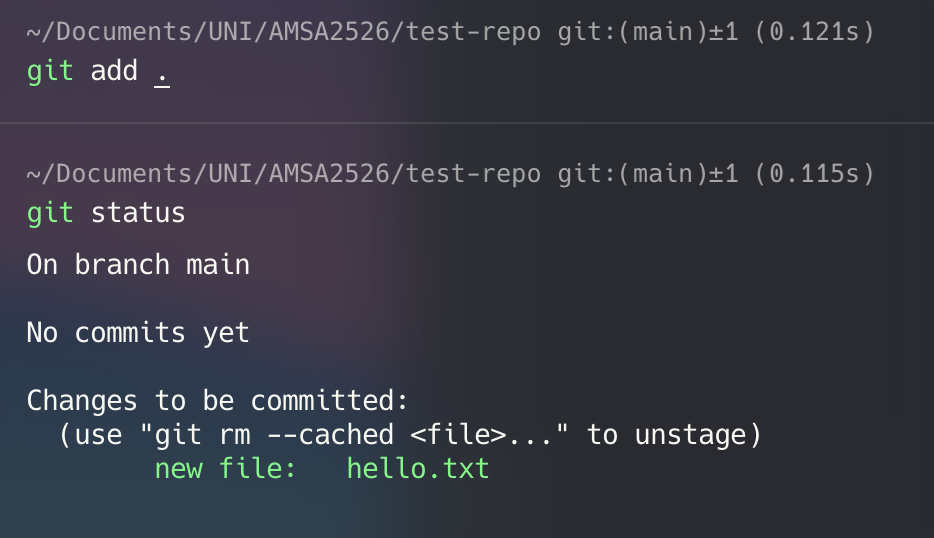 Now, our files are added and tracked. The next step is to commit the changes, making a new “snapshot” of our files. Do so with:
git commit -m "your message here"Take into consideration that the message should be clear, short and representative of the changes you’ve done to your repo with this commit. 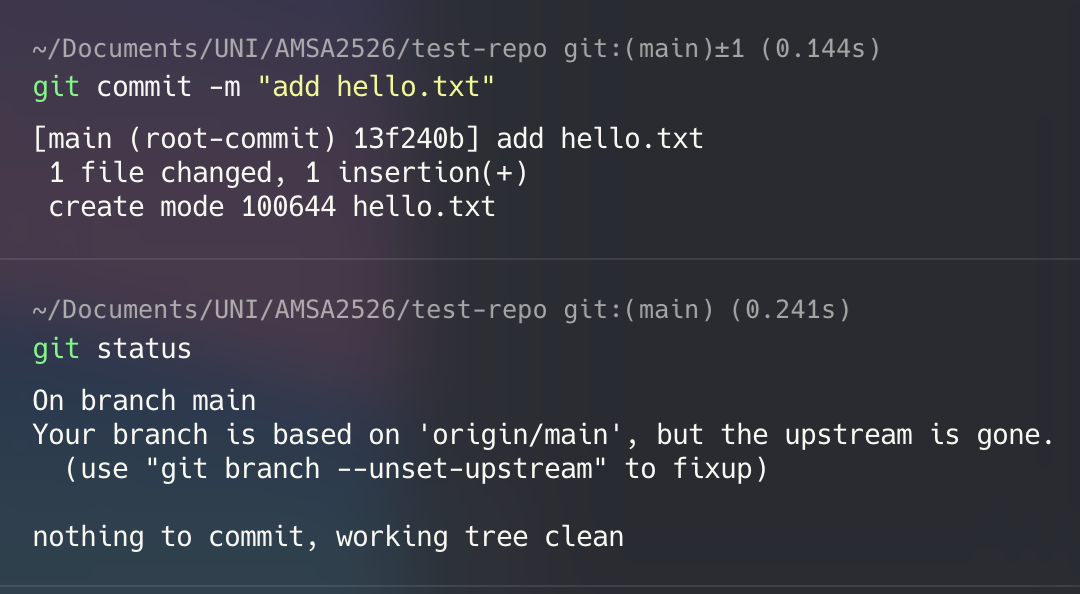
Now our local repository has a new commit. The only missing thing now is to push/upload the changes to the cloud. Do it with:
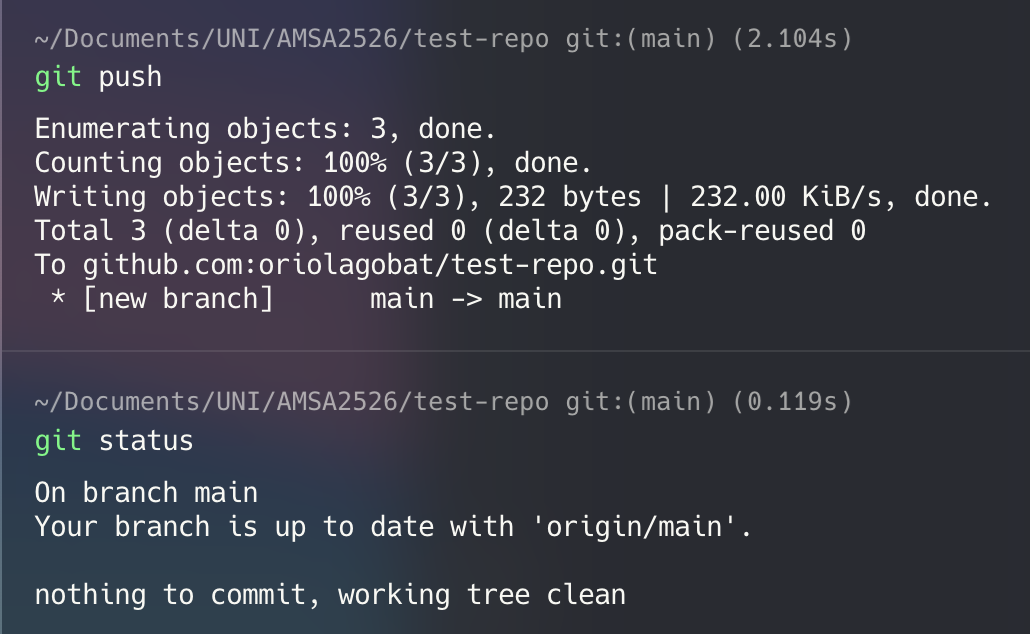
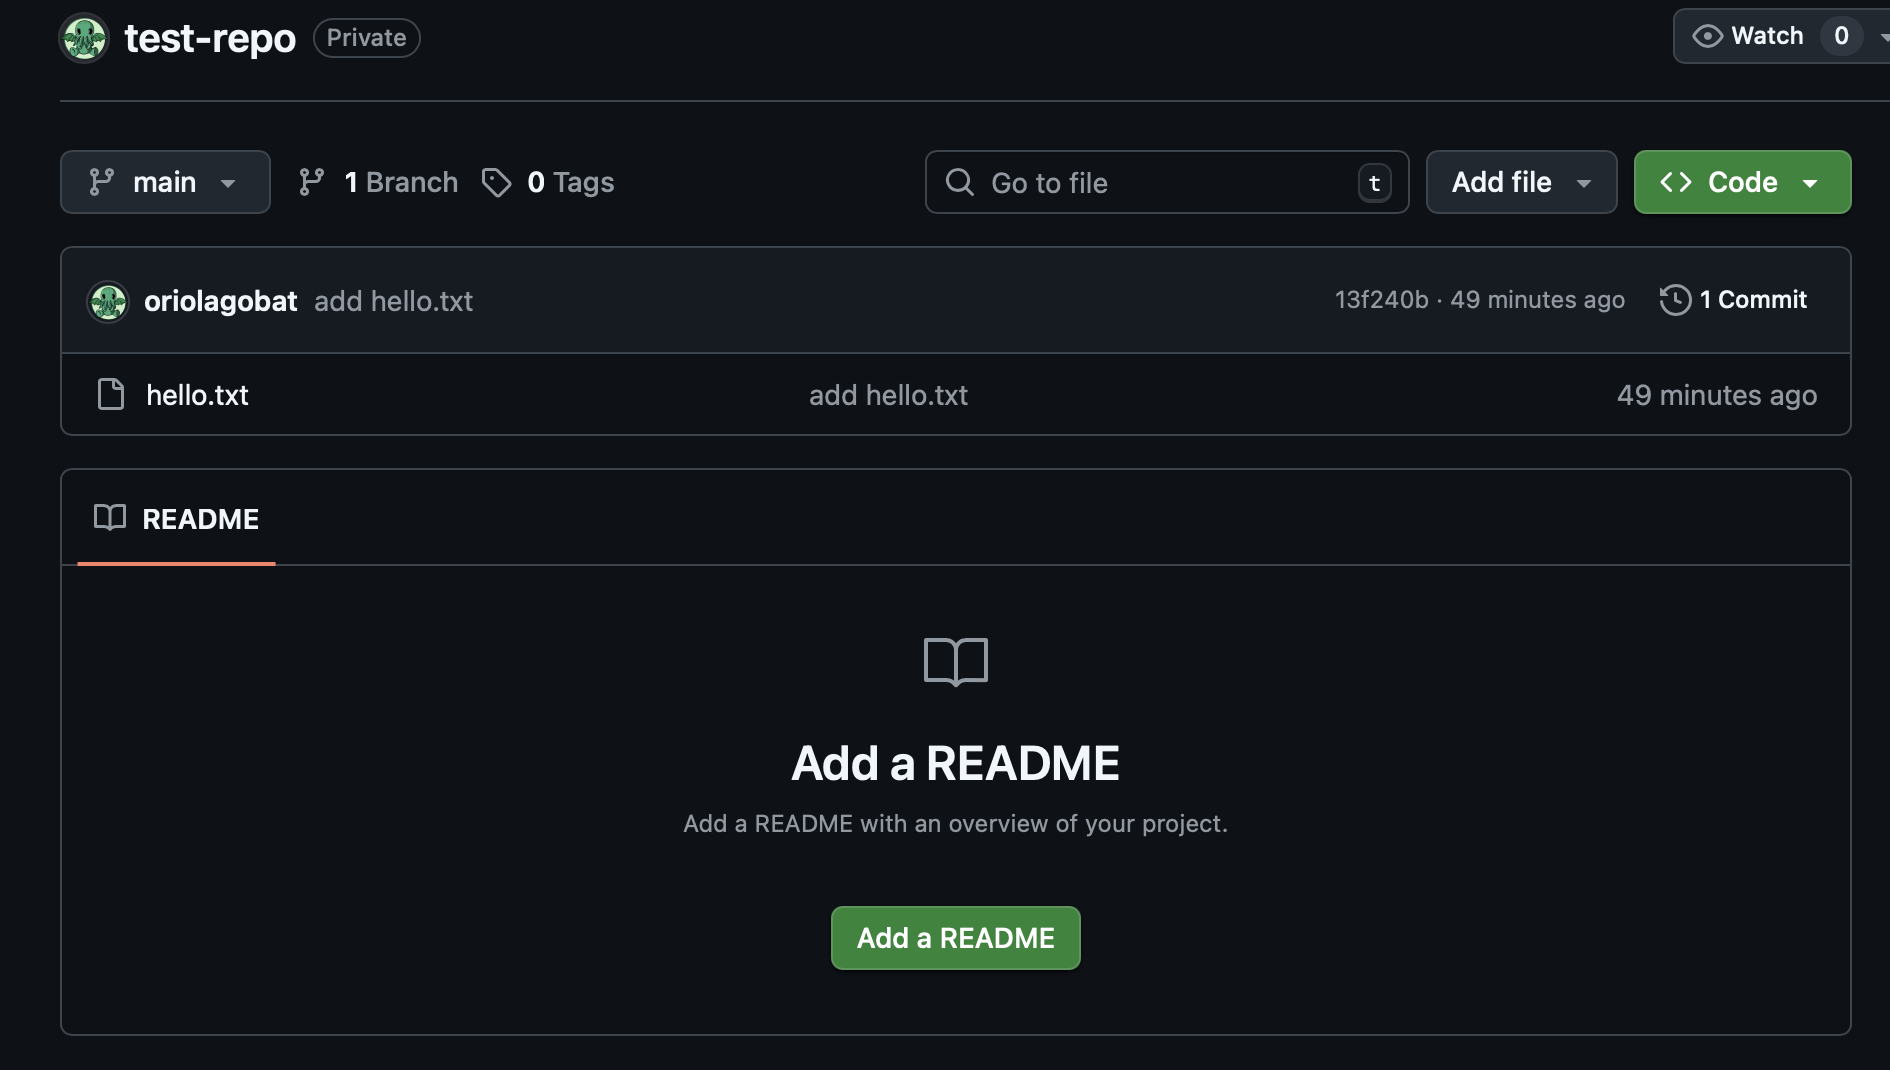
git pushAs you can see, our files now are on the cloud, and the working repository tells us there are no more changes to be done.